Tuesday, August 30, 2011

Semi Homemade Banana Cake with Chocolate Frosting

We seem to love desserts in this house so much and we love making cakes and other dessert goodies especially when it involves chocolate.  At times we always love doing something quick when we have that taste for something sweet.  I always have cake mixes available on hand, everyone should.  My favorite brands are Duncan Hines and Betty Crocker.

Well tonight was one of those nights we had a taste for something.  So we decided to make Banana Cake with Betty Crocker's Rich and Creamy Chocolate Frosting which I think is the best already made chocolate frosting.

You can use already Banana flavored cake mix but since I didn't have any I used yellow cake and will add ripe bananas and 1 small box of banana cream pudding.  If I had the banana mix, I would still add the banana cream pudding and ripe bananas.  I love bananas.  Hey they use to call me "Anna Banana" in school!

So when you crave for something yummy, I suggest making this cake.  It's moist and yummy and so comforting.  The whole family loves it and it never lasts long!


Banana Cake with Rich & Creamy Frosting:
1 Box of Duncan Hines Banana or Yellow Cake Mix (I prefer the Banana Cake Mix for this recipe.)
2 Ripe Bananas
4 Eggs
1 1/2 cups Water
3/4 Vegetable Oil
1 small box of Jello's Banana Cream Pudding
1 tub of Betty Crocker's Rich & Creamy Chocolate Frosting
6 ounces of mini semi sweet chocolate chip lightly tossed in flour (optional)

Preheat Oven to 350 degrees.  
Grease or Parchment Paper Line a 9x13 inch baking pan.

Mix cake mix, bananas, eggs, water, vegetable oil and pudding mix in a large bowl with a mixer until well incorporated.

Toss your semi sweet chocolate chips in flour and fold into cake batter.  (This is an optional step)

Pour into pan and bake for 30 or 35 minutes until a toothpick inserted in the middle of the cake comes out clean.

Let cake cool and frost with Rich & Creamy Chocolate Frosting.  

Sit back and Enjoy!  Mmmmmm!

Sweet Dreams,
Annamaria

Monday, August 29, 2011

Chicken Paprikash

I have been craving for Chicken Paprikash for so long.  My mother in law makes a good one that is good.  She doesn't cook hot heavy meals/stews in the summer, so we always have to wait for the fall and winter months.  I couldn't wait that long, I had to have it.  I looked all over the internet, couldn't find something I was looking for.  Then a local bar served Chicken Paprikash and I heard it was good so I went to check it out, I checked out the menu.  It was a place that closed and someone bought the property and made a completely remodeled Restaurant/Bar.  So I asked the Bartender about the Chicken Paprikash and she said they were all out.  They were making the noodles.  How hard is it to make the noodles.  You mix the dough and drop it inside some hot water!  LOL!  I made homemade cavatelli in one day and that is just me and you have to form it and everything.  Well I thought at this point I was not meant to have Chicken Paprikash.  Then I thought, forget it, I am just going to make it myself even though I have never made it.  I better start now!

This recipe is a mix of what my mother in law told me, she just gave me ingredients, she eyes the recipe like I do most of the time.  As she said it's never made the same each time.  I think that's true with any dish.  So I researched some of the methods of making this dish and incorporating the ingredients of my mother in law's and then added my twist to it.  As I discovered, I didn't have to wait for Chicken Breasts to thaw, I just dropped them into the pot with the broth and poached/stewed the chicken.  It worked great and the chicken picked up the flavors of the broth mixture.

This is what I came up with, it's so good, has a kick from the pepper blend and it's creamy and comforting.  I could eat comforting hearty meals all year round.  That's how I grew up.  Granted the summer months provided us with summer vegetables aplenty and it was a lot of vegetable inspired dishes, but we Italians eat!

I hope you like it as much as I love it, or I hope you end up loving it.  It's easy.  Some people say it's an all day event, but really it's not.  Quite easy for me.  I knew the flavor I was achieving.  Also for my husband who hates Chicken Paprikash loved mine.  So SCORE!  Now I can actually make this for more than just me.  As I said I like it with a little kick and knowing my daughter wouldn't eat it, I made it such as with a kick.  But if you have kids who do or would eat this, not only God Bless You but you can lessen the amount of pepper blend you use.  Really it's to your liking.  I also want to note that I kinda think of this as more as a stew type dish.  You don't have to mix in the spaetzles like I do into the broth, you can certainly ladle this creamy chicken goodness on top of noodles.  I mix mine all together.  I just wonder, how would this taste if I added mushrooms?  I know my husband would definitely not eat it since he HATES mushrooms.  Okay I will stick with traditional.  But if you do add anything to this dish, I'd love to hear about it.

My yummy bowl of Chicken Paprikash!
*Don't you just love my Arial Photos...LOL!

Ingredients/Recipe:
5 Large Chicken Breasts (thawed or frozen)
48 Ounces of Chicken Broth
2 Packages of Spaetzles or Homemade
1-3 Tablespoons McCormicks or Lawry's Seasoned Pepper Blend (this is what gives it a kick, so use to your discretion).
3-4 Tablespoons Sweet Hungarian Paprika or McCormick's Paprika
1-2 Tablespoons Garlic Powder
Couple Dashes of Salt
1/2 Onion (diced or sliced) (optional)
3/4 of a stick of butter
8 ounces of Heavy Whipping Cream
8 ounces of Sour Cream

Take your half of an onion and place it in a large pot with 1/4 stick of butter until onions are softened.
Add Chicken Broth to pot and add chicken breasts.  Start to add your Paprika and Seasoned Pepper Blend.


Mix everything together and let it boil until your chicken breasts are fully cooked.


At this point you want to lower your heat and remove your chicken breasts that have been boiling in the pot, to a separate bowl.


Shred your chicken using 2 forks or cube your chicken with a chopping knife.  I shredded mine but left big chunks as well.


Remove about a half cup of broth from your pot into a mug or small bowl and add about 3-4 tablespoons of flour to the broth.  Mix until you get a slurry.  This will thicken your sauce.


Add your chicken and spaetzles to the broth and let boil for a couple of minutes.  Then add your slurry and mix in the pot until incorporated and boil until it starts to bubble and thicken.  If you'd like it thicker, take more of the broth into the cup and add flour and make more slurry and add to the pot until it gets thicker.  Don't make it too thick or else it will be too pasty.

*Notice the deep red color, this is achieved by using the Paprika.

Add in salt, garlic powder and rest of butter.  Mix.  Add more Paprika and Seasoned Pepper Blend to your liking.  Add in your Heavy Whipping Cream and stir, this will now lighten the broth and make it creamy.  Simmer and then at the very end when your ready to finish the dish, mix in the Sour Cream.  Turn off the heat!

*Notice the Pepper Flakes, I used a lot of the Seasoned Pepper Blend.
You can use less if you'd like.  Taste test.

Finished Hearty Bowl of Chicken Paprikash.


You can eat this right away, it will be very hot so let it rest a few moments.  Ladle into a bowl or on a plate and serve with some biscuits, croissants or crusty fresh bread.  As with anything, it always tasted better the next day, so if you'd like make this the night before and serve it the next day.  Either way it's delicious.

*Side thought:  I wonder what it would be like if I added about 4 ounces of Cream Cheese to it?  You know me and my cheeses!  I bet it would be yummy!  I actually almost topped this with freshly grated Parmesan!  Hee Hee!

If you have any questions about this recipe or any recipe, feel free to leave a comment and I will get back to you!

Enjoy!
Annamaria

  barnwoodchicbanner (Square)

One of Cleveland's Great Pizza Places: Romeo's Pizza

*Romeo's Pizza

The other night my husband wanted pizza, big surprise right?  He could eat pizza all the time.  Not me, despite the fact I am 100% Italian.  Great thing about Romeo's is that I could have something totally not Italian or Pizza related items.

Okay, a debate with me, I rather get their pizza in a half she than a round.  I think the pizza in a round shape doesn't give the taste of Romeo's good representation.  Just my opinion, my husband although disagrees and he could go round, square, octagon, rectangular, he doesn't care, he loves it.

Hilarious Side Story:  One night, of many nights of ordering from Romeo's, we decided to get pizza.  My daughter insisted she didn't want the round pizza.  She wanted the round pizza in triangle pieces, as she describes.  Whine Whine Whine, seriously, about the shape of your pizza?  But could I complain because I prefer it square?  LOL!  Well we went on to get a half sheet.  Mine of course vegetarian (not that I'm vegetarian) and my daughter and husband prefer Pepperoni and Sausage, mostly just Pepperoni, so we do half and half.  Anyway, my daughter insisting she wouldn't eat the squares, my husband in the kitchen said, "No I got round too!".  I was like why would he get a round pizza too?  Then he comes in the living room with 2 small triangular pieces of pizza for our daughter.  Then it registered, he tricked her, he took a square piece and cut it diagonal to make it into triangles.  She was just fine with it, but I took a look, then it registered and I fell off the couch laughing so hard.  My husband and I were laughing so hard because of what he did, that we could barely breathe.  It was one of those things where you laugh so hard, you just can't stop.  I mean tears, almost peeing your pants Hilarious!  She just kept saying while eating the pizza, "What's so funny?"  She didn't even realize it.  We did eventually tell her and then of course she tackles us and laughs with us for playing a trick on her.  Hey, now she eats Square Pizza!  Point for the Parents!  LOL!

I actually have 2 photos to share with you, of course piece of pizza are missing because when I go to take photos it's already too late to get it in whole.  These pizzas are from 2 different nights of Romeo's pizza....

SQUARE:
1/2 Pepperoni & Sausage and 1/2 Peppers, Red Onion and Mushrooms


ROUND:
Pepperoni and Sausage


Well as you see above, they both look great.  I think the difference really is that for me the square has more of a thicker base where the round is thinner and edges are crispier.  Most people don't really see or taste the difference.  I prefer to order the Half Sheet Square.  The pizza is great reheated in the oven or microwave the next 1-2 days.

Now we've also had their wings, I tend to ask them to make them extra saucy, I like a lot of sauce on my wings.  They also have boneless wings, which are great pieces of chicken breast.  They are fried and breaded and then tossed in the sauce.  The bone in wings are not breaded.  The sauces that are my favorites is the Teriyaki, Hot and Parmesan Garlic.  YUMMY!  Sorry I don't have a pick of either.

To add to the list of things we have had is the subs.  I love the Chicken Teriyaki, Philly Cheesesteak and The Italian Burger (which is like a Roman Burger from Mr. Hero but less greasy).  My husband loves their Godfather sub.  I've tasted it and it is also good in my opinion.  I have to tell you, every time I order a sub, I always ask for extra cheese.  I love cheese, it's an addiction really.  LOL!

Here's the Cheesesteak, it's not the best picture but you get the idea:
It comes with Peppers and Onions but I also add Extra Cheese and Mushrooms.
I just wish they would of grilled the peppers a little more, they were still crunchy.


To accompany our dishes we have had their Onion Rings that are battered which I prefer to than breaded.  The downfall to ordering the wings is that when you get them, the condensation of the container makes the Onion Rings no longer crispy but limp.  They still taste good but not at their peak taste.

Romeo's has a good staff that we have dealt with in the Parma location.  One night they didn't answer their phone and we assumed they were closed.  They called us back and said they were going to be there late making dough so if we wanted something, we could order for Pick Up.  Wasn't that nice?  I think so.

So try out Romeo's Pizza.  They have won awards in Ohio and in other states for best pizza.  They have many locations.  I like getting mine delivered, I don't mind the wait.  When my husband picks up the food, which it's almost on the other side of Parma from where we live, it gets cold when he picks it up.  So I rather have it delivered.  I am grateful they deliver to our side of Parma as well.

There's nothing more I can tell you.  They are great pizza for parties.  They also cater other foods for events.  Check them out online.  Link below.

Go ahead and try some of the best pizza in town!  So many locations!  Cuyahoga Country, Summit County and Medina County.

Website:

Facebook Page:

Romeo's Pizza on Urbanspoon

Mangia Mangia,
Annamaria

Sunday, August 28, 2011

Good Ol' Southern Cooking at Cracker Barrel

Weirdest thing happened, we went to Strongsville Mall this past weekend and as we were getting our son into the stroller we saw my mother in law coming out of the mall when she was done shopping. (She also saw thw movie "The Help" and said it was awesome!)  So we had her come in with us because we were getting the kids their haircuts. My daughter is starting school so I thought she could use a fresh start trim for school and my son's hair was starting to look Joan of Arc (a bob with short bangs). I had cut his bangs and then his long hair almost looked like a bob. It was well over due for a cut. We went to Master Cuts because they were the only salon that weren't booked even though they almost didn't take us because we were 15 minutes late. If I had more time I would of gone to my cousin's hair salon, but it's sometimes hard to get her because she's always busy and Alto Capelli is not open on Sundays. It's easier to handle the kids when my husband can help me wrangle them.

So anyway, we got their haircuts. My daughter just got a trim with a bit of long layers. Pretty Basic. My son got his hair cut, which was a little more work and being 2, it's not easy. The girl pretty much did the best she could, I've seen better and the blending wasn't great. I like to keep his hair a little long because he looks silly with short hair. So the first part of my review is to say that I really wouldn't go to Master Cuts again. It was one of those major chain hair salons like Great Clips or Best Cuts. I think getting a hairdresser that is really talented in one of those salons is like a diamond in the rough. So next time I will pass. Not to mention the fact the girls gave me dirty looks and an attitude for being 15 minutes late. They say they close at 6pm and we were there at 5:15pm and they had no other customers and they usually only take walk ins but I called ahead and said we would be there around 5. So they knew we were coming. They weren't even closed and the turning customers away. They were technically still open so why would they do that? Bad business and customer service move and such a turn off. I could of smacked that attitude right out of the girl because I already wasn't in the mood for dealing with someone's attitude.

Then after the mall since it closed at 6pm, which sometimes I wish the mall would close later on Sundays than just on the Christmas Holiday season. It seems like there is not enough hours in the day and my husband only gets Sundays off being a mailman, so he tends to get a slow start on Sundays.

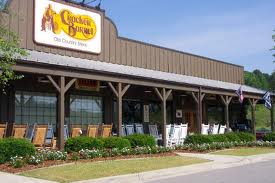
Cracker Barrel in Brooklyn, Ohio

We decided to get something to eat, my daughter chose Cracker Barrel. I could of gone for some Macaroni Grill since we were so close anyway, but since Cracker Barrel was close to home and it didn't sound so bad we went there.

Surprisingly it wasn't too busy when we entered and I couldn't believe that the Halloween AND Christmas Decorations were already out for Sale. Okay I could understand maybe Halloween but not Christmas too? I felt suffocated at the idea of the holidays creeping up on us. Of course I wanted so many of the decor items! I could go crazy! But I had to be frugal because my daughter is starting school and the new session starting for gymnastics next week. So pass, maybe next month?

Okay we sat, we got a great waitress and brought biscuits out so we could give the kids something because they were both very hungry, well so were we. My mother in law came with us an she decided to have my daughter sleep over so the next day they would go and see the Smurf movie. My daughter loved it.

We ordered our food and we all ordered something different. My husband got the Pot Roast dinner, My mother in law got the summer special which was the Brisket, I got the Sunday special which was the Fried Chicken Breast Filet dinner. My son got the Mac & Cheese and my daughter got Pancakes with Bacon.

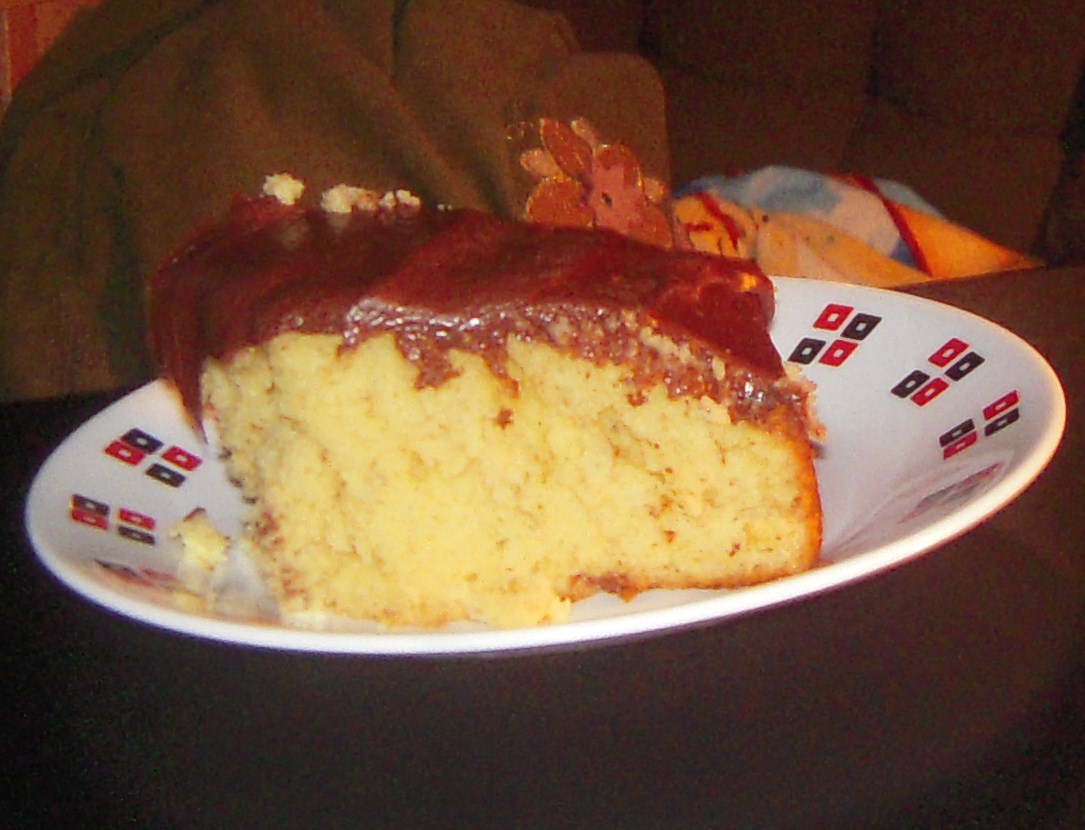
We got our food and I didn't like the chicken, I was contemplating between the meatloaf and the Friend Chicken and the waitress said the Fried Chicken.  So that's what I got.  It was so over fried the chicken was dry and the breading was burnt.  So I sent it back and got the meatloaf instead, which was really what I wanted in the place.

(My meatloaf slice was bigger than this, this is just a random photo, I forgot my camera!)

My husband said his Pot Roast was good and tender, my daughter loves their pancakes which of course they are.  My meatloaf was good.  I think though mine is better.  My mother in law said her brisket was overdone and dry, and honestly, it didn't look appetizing and it was like 3 over cooked dry strips that looked tough.

Our sides always include the carrots, macaroni and cheese, hashbrown casserole, mashed potatoes, corn, etc...  They were great as always.  But I do think their mashed potatoes were salted enough or buttery enough.  They were kind of bland and definitely needed the gravy.

Our belly's were full and enjoyed a nice dinner together.  I really like the Brooklyn Cracker Barrel.  I remember driving almost an hour with my family to go to Cracker Barrel in Akron or Sheffield.  But now for years we have had one so close, so the nostalgia of Cracker Barrel isn't a big deal anymore.  Although they have great dishes that no one else can make like them.  I could really do without the Saw Mill Gravy, I don't like it.  I prefer Sausage Gravy to top my biscuits and Country Fried Steak, which is awesome at Cracker Barrel as well as the Chicken Fried Chicken.  Breakfast is always good at Cracker Barrel.

I know they are famous for their hashbrown casserole but I have to tell you, they must have the BEST macaroni and cheese!  It is so good!

For my son's first birthday/christening party I had Cracker Barrel cater the sides, I got a big pan of the hashbrown casserole and macaroni and cheese.  Let me tell you, my guests ate it up!!!!

So yes they do cater, you just have to call them in advance.  It's a great price and they can do big pans and half pans.  Kids love that mac and cheese so the kids went crazy and so did the adults.

I got my main dish which was Fried Chicken from Mr. Chicken in Parma and also got their biscuits.  100 pieces of chicken!  It was so good and fresh and made right in time for me to pick it up.

We always have so much food at our parties.  I like to get mine catered instead of cooking sometimes because not only do you end up not spending as much as if you would make it yourself but you have so much more time to focus on having fun at your event.  I do make some things, maybe snacks and such but mostly catered.  I at one time had 3 different places cater 1 party....  I am always wanting to satisfy all guests and tastes.  The left overs are great too!

So enjoy my all over the place blog tonight or morning....  I hope it gave you some ideas.  Sorry I don't have many pictures up.

Sweet Dreams,
Annamaria

Cracker Barrel on Facebook:
Facebook Page

Cracker Barrel Website with Menu:
Website


Cracker Barrel Old Country Store on Urbanspoon

Comforting Homestyle Bread Pudding


I love Bread Pudding and this has to be the one recipe that brings me so much comfort. The mouthful of sweet and cinnamon with a beautiful indulgence of custard soaked bread is just one of those Ahhhh moments. When it's made right, bread pudding is the perfect anytime dish! I don't use a lot of raisins because I am not a huge fan but you could put more if you'd like. This is also great served with vanilla bean ice cream.

BREAD PUDDING
2 cups Whole Milk
1/4 cup Butter, softened
1/3 cup Sugar
3 Eggs
2 tsp Cinnamon
1 tsp Pure Vanilla Extract
3 cups Bread, tore into pieces (any bread, french bread, raisin bread, croissants, glazed donuts)
1/4 cup Raisins

SAUCE
1 cup Whole Milk
2 Tbsp Butter, softened
1/3 cup Sugar
1 tsp Pure Vanilla Extract
1 Tbsp Flour
dash of salt

Directions:

In a saucepan, over medium heat, heat milk. Add butter. Stir constantly until butter is melted. Set aside.

In a separate container, combine sugar, eggs, cinnamon and vanilla. Slowly add milk mixture. Set aside.

Place torn pieces of bread in a casserole dish.

Pour batter on top of bread. Sprinkle raisins.

Bake at 350F for 45 to 50 minutes or until set.

SAUCE:

Mix everything together in a saucepan and bring to a boil stirring constantly. Set aside for a few minutes and then pour on warm bread pudding.

Enjoy!

Sweet Dreams,
Annamaria


NightOwlCrafting 

Sunday, August 21, 2011

Twinkie Pudding Cake

*Photo taken by Karla Everett

This is a quick and easy dessert that requires no baking. That semi homemade dessert that is fabulous. Great dessert after a heavy meal because it's so light and not rich. It's decadent, creamy. You can certainly use pound cake instead of twinkies but if you're making it with kids, this is a fun dessert to make with the kids. It's a great dessert for kids and adults alike! A great way to use a past time treat of the good ol' Twinkie! YUMMY!

Recipe:

1 box (10) of hostess twinkies (or about 2 loaves of pound cake)
4 large bananas sliced
1 can 20 ounces, crushed pineapple drained
1 box large instant vanilla pudding box (mixed with milk according to pkg. directions)
1 package 8 ounces of whipped topping
maraschino cherries and nuts for garnish (nuts optional)

Remove Twinkie cakes from wrappers.

Cut each in half lengthwise from top to bottom.

Place Twinkie halves in 9 x 13 baking dish with cream side facing up.

Layer sliced bananas, pineapple, pudding, and Cool Whip over Twinkies in that order.

Sprinkle with cherries (drained well on paper towels) and chopped nuts.

*Keep refrigerated for about an hour and then serve.


Sweet Dreams,
Annamaria

*Thank you Karla for taking a picture of the recipe and trying it out yourself and giving 5 stars!

Thursday, August 11, 2011

Quick & Delicious Coconut Cake


This cake is one of those semi homemade desserts for your guests who don't need to know that it's semi homemade. For some recipes I love using cake mix as a short cut. I believe that Duncan Hines offers a great product and there is no reason you should feel ashamed to use boxed cake mixes. With our busy lives and being busy moms or dads, we look to short cuts to give our kids and families good meals quick but good at the same time without lacking in taste. This is one of those recipes. It's delicious and gives that homemade taste without knowing you used boxed cake mix.

Great in flavor and so very moist, this is one of my favorite coconut cake recipes!

Quick & Delicious Coconut Cake

1 Box of Duncan Hines White Cake Mix
3 Egg Whites
2 Tbsp Vegetable Oil
1 1/3 Cups Milk
2 1/2 Cups Shredded Coconut
1 Cup Cream of Coconut
1 container of Cool Whip

Put cake mix, egg whites, vegetable oil and milk.


Add 1 cup of the shredded coconut in a bowl and mix with an electric mixer for 2 minutes.


Pour in a greased 9×13 pan. Bake at 350 for 20 to 25 minutes or until a toothpick inserted comes out clean.


Remove from oven and immediately poke holes all over the cake. Pour 1 cup of Cream of Coconut over the cake. Cool the cake. Spread cool whip on the top and sprinkle with remaining 1 1/2 cups of shredded coconut.

Put in refrigerator for a number of hours before serving or overnight.

Wishing you Sweet Coconut Dreams,
Annamaria

Monday, August 8, 2011

Homemade Sausage Gravy


I love Sausage Gravy. A perfect addition to a breakfast, on top of biscuits, toast, hashbrowns, fried breaded chicken breasts. It's such a comfort food and such a treat to have. I have had some really good sausage gravy and some really gross sausage gravy. I really love Bob Evan's sausage gravy at the restaurant. It's probably the best I've had. But I like making it at home too. I make some Pillsbury biscuits and slather the gravy on top... So comforting.... So good!


SAUSAGE GRAVY

2 lb bulk pork sausage
1/4 cup flour
4 cup whole milk or 2%
salt and pepper to taste

In a large frying pan fry the sausage while breaking it up into pieces with a spoon until browned and cooked through. Next sprinkle with the flour and continue cooking for about 1 minute over medium heat. Add the milk and cook over medium high heat while constantly stirring with a whish until thickened, about 3-5 minutes. Season to taste with lots of fresh black pepper and a little bit of salt. If the gravy doesn’t thicken enough, then mix a little bit more flour with milk and add to the pan.


The Best Place to Paint and Make Pottery in Cleveland: Kiln Pottery

*Photo belongs to Kiln Pottery


Being an artist I love to create and do arts and crafts. I used to make and paint pottery in Art Class in Junior High and High School when it was an assignment. I never did the typical bowl or cup like most students. The most memorable item I made was in highschool. We had the same art teacher from 6th grade to 12th grade, Mr. B is what we called him. He is such an amazing artist and an inspiration when I was in school to further my art. Now that I am older I decided that I wanted to go and take a pottery class. There was much of a selection to have the opportunity to make your own pottery. There was a place though that I found when I drove to pay my car insurance and there was a place a few doors down at a store front where I saw that you can paint pottery. I thought it was awesome when I looked in. So my husband one day took me for my birthday. It was nice, my husband painted a shark that had a lid on in. This is where we put our daughter's teeth when they fall out but let's keep that on the down low! LOL!

I had such a great time at this place and the owners were awesome and really artistic themselves. The first thing I painted was a Christmas Tree, that you put little light bulbs on. I always wanted one since I was a little girl but they didn't sell those trees and at the time the ones selling on eBay were really expensive. I remembered always seeing the one my Godmother always put up every Christmas and I thought it was so cool!

So I painted one. Of course it was painted green. It took awhile because you have to put many coats on it so you get a full coverage. We left our items there for them to fire them in a kiln which only took a few days. When I got the tree they also give you the bulbs to put in the holes of the tree and the light kit which is really easy to put together. That wasn't the only tree I did there, I also made a black one for Halloween with orange and purple bulbs and an Easter/Spring one which was painted Ivory and I put pastel lights on it. They came out so beautiful and I wanted to keep going back to make more and more.

I've taken my daughter there and my niece and they loved it. My daughter made a Unicorn and my niece did a Mermaid to look just like Ariel of The Little Mermaid. I helped but left the creativity to them. They still have them and have not broke them. They came out so nice. They have a shiny glaze on them that brings out the color so nicely and bright. You have so many choices of colors and items to paint. During the holidays you can paint holiday inspired items. I could paint so much there and always want something else to paint.

They offer parties, lessons and now they offer classes to actually make your own pottery on a pottery wheel, so now you can actually get your hands dirty. It's a very relaxing atmosphere and painting the pottery is relaxing as well. I highly recommend it.

*Photo belongs to Kiln Pottery


So I encourage you to go and visit Kiln Pottery. You can also visit their web site to get a feel and they also have a little http://www.kilnon82.com/Picture-Gallery.html online you can see some pictures of what people have made. There is so much to choose from you can easily find something to paint. I've painted cupcakes trinket container, trees, stars, etc... Great for boys and girls, women and men! You can even create something to give as a gift! Best of all, they are there to help if you need it.

As far as price goes you just pay for the piece you want to paint, the paints and brushes are included and the time is endless. Of course if you don't finish a piece you can always go back back and finish it on another day.

So enjoy your time with friends, family or have a party! You'll be guaranteed a great experience!

Visit their web site here, Kiln Pottery

Have fun and spend some quality time with yourself or with others!

Get Creating,
Annamaria

Sunday, August 7, 2011

Onion Straws


These are so good, crispy onion goodness. These are great on sandwiches, appetizer or as a side dish. I love dipping them into ketchup or ranch dressing. They are so great fresh and still a little warm. The best thing about them is that they are so easy to make.

1 large Onion
2 cups Buttermilk
2 cups All Purpose Flour
1 Tbsp Salt
1/4-1/2 Tbsp Cayenne Pepper
1-2 qt Oil for frying
Black Pepper to taste

Slice onion very thin. Place in a baking dish and cover with buttermilk and soak for at least an hour.

Combine dry ingredients and set aside. Heat Oil in pan to about 375 degrees.

Grab a handful of onions, throw into the flour mixture, tap to shake off excess, and push into hot oil. Fry for a few minutes and remove when golden brown. Repeat steps til all onions have all been fried.

Happy Eats,
Annamaria

Perfect Buffalo Chicken Sandwiches


Did you ever have a craving that seem to never end? This was one of them! It all started with trying Wendy's Buffalo Dipped Chicken Sandwich. I was hooked, I think I almost ate that sandwich for 2 weeks straight for lunch and it was killing my wallet! So I decided to make my own, I even have my husband hooked. I knew Frank's Red Hot came out with a Buffalo Wing Sauce and thought that I could make my own Buffalo Chicken Sandwich which would be even better than Wendy's! So this is what I came up with and it's a hit at home. Both grilled or breaded chicken breasts work well with this. I have had both. I just saved my wallet with this recipe! ENJOY!

MAKES 4 SANDWICHES

4 hearty sandwich rolls
4 grilled or breaded chicken breasts thoroughly cooked
1 bottle Frank's® Redhot® Buffalo Wings Sauce
slices of provolone cheese (optional)
blue cheese crumbles (optional)
blue cheese dressing
tomato slices
lettuce leaves
sliced red onion

Cook chicken breasts either by breading or grilled.

Dip or baste chicken breasts with buffalo wing sauce.

Place chicken on roll and top with provolone cheese or blue cheese crumbles. Top with optional lettuce, tomato and red onion. Spread blue cheese dressing on top side of roll and cover sandwich.

Take a big bite and enjoy! You just ate one of my favorite sandwiches!

CHOMP CHOMP,
Annamaria

Taralli, The Italian Pretzel

A fellow blogger, Marcellina of Marcellina in Cucina posted some Ethnic type of pretzels and they reminded me of the Italian Pretzel called Taralli. There are different kinds of Taralli, one savory and one more on the sweet side. I have eaten so many of these pretzels that are usually made by my Aunts or my Godmother. We've had them at weddings, showers, snacking actually just about everywhere. They are crisp and peppery as well as the taste of caraway seeds. Some Italians make them without caraway seeds but some use both pepper and caraway. I've eaten so many of these because they become addicting, you just keep eating them and eating them. I love them and they are great to snack on. I remember going to my Godparent's house and my Godmother would have a basket of freshly made Taralli. So I share this recipe with you. This is a great recipe and the only thing that is time consuming is forming the pretzels. But eventually you'll get the hang of it. This is a recipe for the savory ones and a good amount to start off with. This is the version that is primarily used in Southern Italy especially in the Puglia region which my city Bari is in.

*I hope you try them Marcellina! =)

Savory Italian Taralli


1/2 cup warm water
1/2 Tbsp dry white wine
2 cups all purpose flour
1/2 tsp salt
3 Tbspn. ground black pepper
1/3 cup olive oil, extra virgin
dashes of fennel seeds (optional)

Sift flour, salt and black pepper onto large bowl.

Make a well in the center and add olive oil & use hands to mix, add dry white wine. Blend together and gradually form dough ball. Knead for about 5 minutes until soft dough ball forms & items are incorporated.

Place in bowl that has been coated very lightly olive oil.  Just a teaspoon.  Let dough rest.  Prepare surface to roll.

Preheat over to 350 degrees.

Break off small pieces of dough and roll into ropes about 6 inches long. Form a ring and pinch edges together.

Fill a large saucepan half full of water; bring to a boil. Drop taralli into water and boil for 1 minute until rings float to top, move them off the bottom if they stick. Remove from water, they are done being boiled when they float, then transfer to dry on a sheet of parchment paper letting both sides dry.

Brush with olive oil and bake 350 degrees on parchment paper lined cookie sheets, turning a few times during baking until light to medium golden brown and crisp. 12-15 minutes. Let pretzels cool and store in an air tight container.

Buon Appetito!
Annamaria

Blue Ribbon Chocolate Truffle Cheesecake

I have been making this cheesecake for years. It's my favorite one and an unforgettable one. This cheesecake won me a Blue Ribbon award through a Recipe Club, Just A Pinch. This was the very first recipe I posted on the site naturally since it was my favorite. During the time it was also the day of my Anniversary and my Daughter's birthday. So it was quite a surprise. I love sharing recipes and I do so at Just A Pinch. Now that I am blogging, I am going to be posting here all my favorite recipes that I have tried myself and love! So this I share with you, a recipe that means so much!


Chocolate Truffle Cheesecake


CRUMB CRUST
1 1/2 cups vanilla wafer crumbs (about 45 wafers crushed)
1/2 cup powdered sugar
1/3 cup unsweetened cocoa
1/3 cup butter, melted

CHEESECAKE
1 pkg 12 oz. package of semi sweet chocolate chips
3 pkgs 8 oz. packages of cream cheese softened
1 can 14 oz. sweetened condensed milk
4 eggs
2 teaspoons pure vanilla extract


Heat oven to 300°F. To make crust, stir together vanilla wafer crumbs, powdered sugar, unsweetened cocoa and melted butter or margarine in medium bowl. Press firmly onto bottom of 9-inch springform pan and set aside.

Place chocolate chips in microwave-safe bowl and Microwave at MEDIUM (50%) 1-1/2 minutes; stir. If necessary, microwave at MEDIUM an additional 15 seconds at a time, stirring after each heating, just until chips are melted when stirred.

Beat cream cheese in large bowl until fluffy. Gradually beat in sweetened condensed milk until smooth. Add melted chips, eggs and vanilla; mix well. Pour into prepared crust.

Bake 1 hour and 5 minutes or until center is set. Remove from oven to wire rack. With knife, loosen cake from side of pan. Cool completely; remove side of pan. Refrigerate several hours before serving. Garnish as desired. Cover; refrigerate leftover cheesecake.

Thank You Roz for featuring this on your Fresh Food Friday!  I am so appreciative that you did that!

NightOwlCrafting   A Glimpse Inside

Sweet Dreams,
Annamaria

Cheesy Creamy Vegetable Rice

My family always has to have a side dish or else dinner just isn't complete. I came up with this recipe from a mix of recipes. It's so good and such a comfort food, I could eat it everyday. The flavors are great together and it's so smooth and creamy and the vegetables give it great color and flavor. You can use any cooked vegetables you like. Adding corn or broccoli or even adding cooked diced chicken for a complete meal. I served this rice with breaded baked chicken and corn on the cob. It was delish!


Cheesy Creamy Vegetable Rice


1 can cream of chicken soup
1 can cream of celery soup
1 envelope liption's onion soup mix
2 oz cream cheese
1 1/2 cups uncooked long grain rice, then cooked according to package directions
1/2 cup water
1/2 pkg frozen peas and carrots
1 1/2 cups heddar cheese, shredded
1/4 cups freshly grated romano cheese (optional)
1/4 cups freshly grated parmesan cheese (optional)
pepper to taste
dash garlic powder (optional

Preheat oven to 350'F. Bring a large pot filled with water to a boil that has been lightly salted. Add uncooked rice and cook rice until done according to packages directions.


In a large bowl mix both cans of creamed soups, cream cheese and envelope of onion soup mix. Add 1/2 cup of water. Then add frozen peas and carrots. Mix all ingredients.


Stir rice into soup mixture and add a 1/2 cup of cheese.


Place in a greased casserole dish and place in oven until casserole becomes bubbly. Add remaining 1/2 of cheese to the top of casserole or top with crushed Ritz crackers and bake until top is browned.


Have A Cheesy Day!
Annamaria

http://verygoodrecipes.com/saint-patrick-challenge

Chocolate Almond Cookies

Chocolate Almond Cookies


These cookies are so good. They are chocolaty and moist. I love the texture and the taste especially since it has Almond Paste in the dough mix. They are easy to make and are sure to be a crowd or family and friend pleaser!

8 ounces Almond Paste
1 cup Butter
1/2 cup Sugar
1/2 cup Brown Sugar, Firmly Packed
2 Eggs
1/2 teaspoon Almond Extract
2 1/2 Cups All Purpose Flour
1 teaspoon Baking Soda
1/4 teaspoon Salt
12 ounces (1 package) of Semi Sweet Chocolate Chips
1 cup Toasted Almond Slivers (optional)

Preheat oven to 350° F. Lay parchment paper on 2 large baking sheets.

Break almond paste into small pieces and place in medium-size bowl or container of food processor. Add butter and beat with electric mixer or process until mixture is creamy and smooth.

Add sugars, eggs and almond extract and beat or process until thoroughly blended.

Stir flour, baking soda, and salt until mixed. Add to almond mixture and stir until blended.

Stir in chocolate chips and toasted slivered almonds.

Drop by heaping teaspoonfuls onto prepared baking sheets about 1 1/2 inches apart.

Bake 10 to 15 minutes or until golden brown. Depends on your oven. Remove from baking sheets and cool on wire racks.